A Range Report
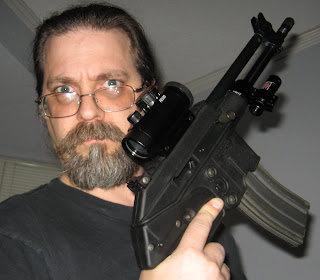
1.) The new Levang Linear Muzzlebrake - Functions very well. It projects the majority of the PLR's throaty roar down range. The muzzle flip reduction was moderate. It was less effective in reducing the muzzle rise than the Veriforce Tactical muzzlebrake, but it had none of the annoying side effects of that muzzlebrake. There was one interesting side effect of this muzzlebrake's forward facing ports... I had just finished firing a new pistol (detailed below) for the first time, so I had the target spooled down to only about 8 yards away when I loosed the first tentative shot through the new muzzlebrake just to see how it acted. The forward ported gas was sufficient to blast a fist sized hole through the target that had already been perforated by the other pistol. That was enough to make me giggle. All in all, if you are looking for a muzzlebrake for your PLR-16, I'd heartily suggest this one.
2.) The polish job on the 1911's feed ramp - This functioned much better than I had hoped. I fired 150 rounds through the freshly polished gun without a single mis-feed. While I was polishing the feed ramp, I also polished the slide's mating surfaces. This made the slide's action smooth as silk. This is definitely one fine shooter now. If you have any semi-auto pistol with feeding problems, a polish job on the feed ramp may well solve your problem. Here's how I did it. I took my Dremel tool and mounted a polished wheel (small white felt wheel that fits on a screw spindle). First I load the polishing wheel up black emery bar to remove the worst roughness. This does remove some material so use it very sparingly. Once I'm satisfied that the worst roughness has been removed, I thoroughly clean the area I'm polishing. I then load up a new polishing wheel with white rouge and begin working the area with that. Once satisfied, I change the wheel again, clean the work area again and finish the job off with blue rouge bar. Once I'm finished, the surface has a mirror finish. What in the hell would I do without my Dremel tool?
3.) We hit a gun show the other day. I picked up a batch of ammo, a nice bipod for my FN-FAL and this for the Mrs.:

It's a Polish P-64 in 9mm Makarov. This is the pistol that perforated the center of the target with, that the muzzle blast of the PLR popped out. I have to admit, I had under estimated this little gun! The recoil from those dinky looking rounds is surprisingly vigorous. With a barrel only about 3¼" long, this thing is not going to be making tight groupings at 50 yards, but it is actually more accurate than I gave it credit for. On a close target (8 yards) I was easily putting all the rounds under an area about the size of my fist. At 15 yards I was having no problem keeping it on the target. There's one last thing I have to cover... The Warsaw Pact countries seem to have known a thing or two about making a gun easy to disassemble for cleaning. To tear this one down, all you do is pull the front of the trigger guard downwards, then pull the slide all the way to the rear; tip the back up and then slide it back forward off of the frame. All in all I have to say, due to it's sub-compact size and acceptable accuracy; one of these guns would make a very suitable concealed carry piece.
I've noticed a lot of interest in my PLR-16 related posts. Here is a list of other PLR-16 posts I've made:


|
<< Home